8 articles Articles posted in vegetables

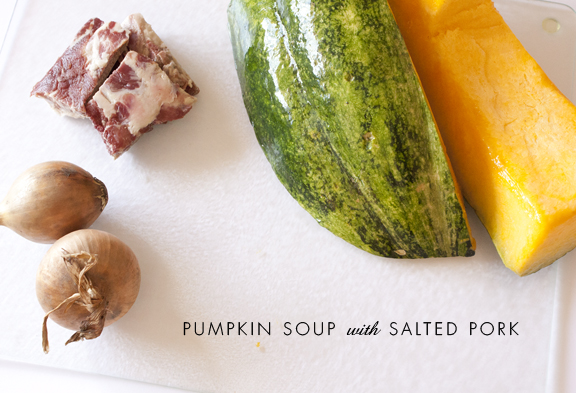
pumpkin soup with salted pork

There’s a certain section of all the grocery stores here in Grenada that has a particularly pungent smell. If you follow the scent, it’ll lead you to a back corner where you’ll find an assortment of salted meats – salted fish, salted pig snouts, and different varieties of salted pork. My sister and I have always had a love and fascination for cured meats, whether it’s prosciutto from Italy, nem from Vietnam, or iberico from Spain. So when I stumbled upon some salted pork in Grenada, I knew I had to try it.

Granted, it definitely didn’t look like the kind you’d snack on with a glass of wine or with some cheese. But I was certain that it’d impart some yummy flavors to any dish that it was part of. So I threw a pack of salted pork riblets into my cart and continued on to the produce aisle. As I continued my shopping, a store clerk started chatting with me and asked me what I was making with my salted pork. I confessed, I didn’t yet know. He suggested a pumpkin soup and proceeded to give me step by step instructions on how to prepare the pork, which was confirmed by an elderly lady passing by — who, I might add, preceded her comments with “Let me tell you how to make it. I am a woman.” :)

So I came home with the pumpkin and salted pork in hand and looked through a few more recipes online. I ended up combining their suggestions with a recipe that I adapted from Hank Shaw’s recipe here. The key differences include the use of pumpkin rather than butternut squash, and substituting salt pork for bacon.

Pumpkin Soup with Salted Pork
Serves 4–6

I had some chicken stock left over that I had made previously with a whole chicken and some fresh thyme thrown in. The thyme adds an extra layer of complexity to the soup, so if you’d like some in your soup as well, you can feel free to throw in some fresh thyme or other fresh herbs as well.

If you’re not able to find salted pork, you can always salt your own. Any cut of pork will do, but riblets are a favorite because they have a bit of fat that flavors the soup and they’re fun to nibble on later. You can go hardcore and make “real” salt pork (takes two weeks) or just cover a piece of pork with salt and throw it in the fridge overnight. If you do the latter, you can probably get by with just rinsing the salt off. Don’t boil it before you add it into the soup or it’ll lose all its flavors and saltiness.

The traditional West Indian version of this soup sometimes includes chopped cabbage leaves. Alternatively, you can also leave out the pork riblets and season the soup with cloves, nutmeg, and some cinnamon. Chilled, this would make a refreshing soup for a summer day! This version is more heavy and substantial, which I find works nicely as a full meal with some crusty bread.

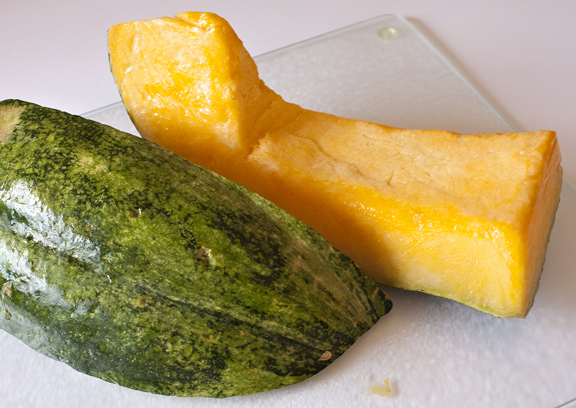
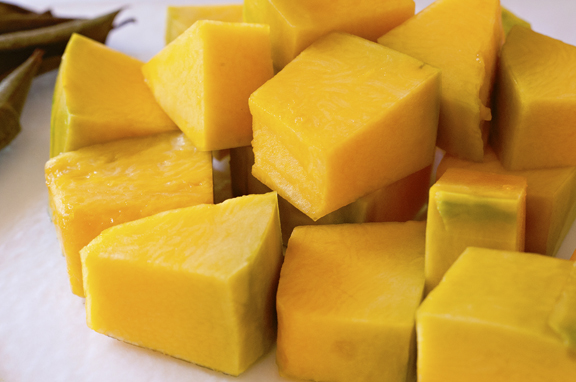
3 lbs West Indian pumpkin (also called Calabaza, but feel free to substitute with butternut squash)
3/4 lb salted pork riblets
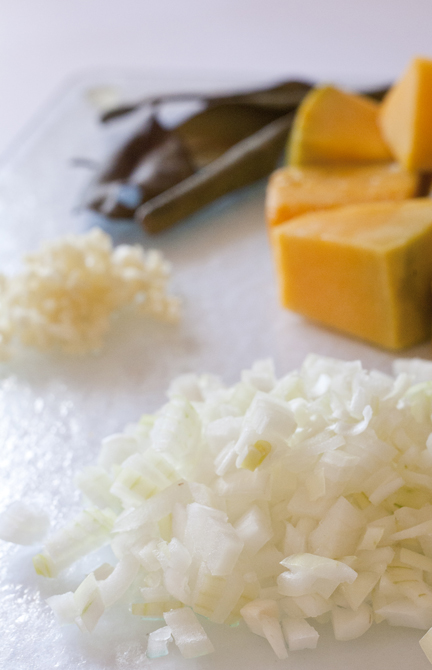
2 small onions, diced
4 cloves garlic, minced
5 bay leaves
1 1/2 quarts chicken stock
2 Tbsp oil

1. Rinse pork riblets to wash off all the extra salt.

2. Put some water in a small pot and bring to a boil. Put the pork riblets into the water and let it boil for about 5 minutes.

3. Discard the water, rinse pork riblets, and repeat one more time. Set pork aside.

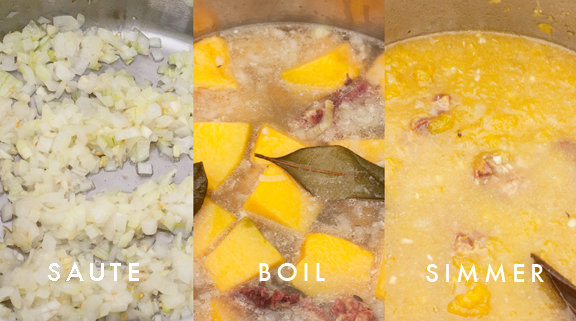
4. In a large stock pot, sautee the garlic and onions in oil over medium-high heat.

5. When the garlic and onions have browned, add in the chicken stock, pumpkin, bay leaves, and pork. Bring the mixture a boil and reduce heat to let it simmer softly. Simmer for at least an hour or until the pumpkin has broken down.

6. Remove pork riblets and bay leaves. Puree the soup.

7. Garnish with fresh herbs and a swirl of heavy cream or coconut milk.

Enjoy!


yong tau foo (stuffed tofu and vegetables)

While my mom was here in DC helping us with our new baby, my dad was left to fend for himself at home. When it comes to eating, though, no one need feel too sorry for him. My mom even offered to cook and freeze him a bunch of meals for the time she’d be away, but he actually shuddered at the thought and pleaded with her not to. You see, my dad hates eating “leftovers” (yes, technically, meals made just for him and then frozen are not really leftovers, but, well, to my dad, anything less than freshly cooked and still steaming hot from the stove is considered a leftover). He also likes to make things on a whim according to whatever strikes his mood at the time, so having a freezer full of food he didn’t make himself is just not his style. Plus — and this is where it gets a bit contentious — he secretly (or not so secretly) thinks that my mom takes shortcuts in her cooking, which means her food is just not up to his standards.

So while my mom was here cooking up bun rieu and bo kho for us, what was my dad making for himself at home? Fried eggs? Easy stir-fries or one-pot meals? No, I tell you, the man was wrapping his own dumplings and wontons. We called him one evening, and he told us he was making these stuffed vegetables I’m about to share with you. There are no boring meals when eating with my dad.

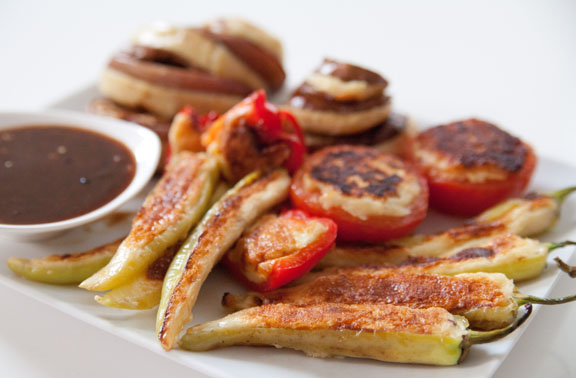
These stuffed vegetables are something my family made often while I was growing up, and I was glad to find them at the markets when I visited Vietnam, Malaysia, and Singapore. Yong tau foo (which means “stuffed tofu”) is traditionally a Hakka dish and originally involved stuffing tofu with ground pork. These days, you’re more likely to see the dish as tofu and vegetables stuffed with fish paste, and it is really popular in Malaysia and Singapore. In our home, we actually called it yeung yeh, which means “stuffed stuff.” :)

Yong Tau Foo (Stuffed Tofu and Vegetables)
Serves 2 as a main dish accompanied with rice, or 4 as part of a larger meal.

You can stuff practically any kind of vegetable you’re able create an opening in. My family’s favorites include eggplant, chili peppers, bitter melon, tomatoes, and long beans that my mom weaves into small wreaths. In Malaysia, I found that tofu puffs and okra (called lady fingers) are also very popular.

Although it is possible to make your own fish paste, after helping my mom make it once, I have to admit it can easily double or triple the time it already takes to make this dish. And it is tricky to get the paste to come out to a smooth consistency. So most of the time, we just get store-bought fish paste and add some extra seasonings and oil to make it smoother and less dense. My mom also adds an egg for richer flavor, and recently she has taken to beating the egg white separately until foamy, before adding it to the fish paste for an even smoother and lighter texture.

Traditionally these stuffed tofu and veggies are served in a broth, but nowadays you’ll see it with sauce more often than not, either on the side or cooked with the vegetables. 

Vegetables (suggestions):
1/2 red bell pepper, deseeded and cut into four square pieces
4 long banana peppers, sliced in half, with the seeds and ribs taken out
1 tomato, cut in half and deseeded
1 long Chinese eggplant, cut diagonally into 1-inch pieces and then butterflied (sliced lengthwise almost all the way to the other edge); you can also optionally peel off strips of the skin so you don’t taste as much of the chewy skin, as well as for a pretty striped look
corn starch for dusting

Fish Paste:
1 12-oz container fish paste
1/4 tsp ground pepper (white pepper is preferable for appearance, but otherwise black is fine)
1/2 tsp chicken bouillon powder
2 Tbsp vegetable oil
1 tsp sesame oil
1 egg, separated
vegetable oil for pan-frying

Sauce:
1 Tbsp vegetable oil
2 cloves garlic, chopped
1 Tbsp fermented black bean paste
1 Tbsp oyster sauce
1 tsp sugar
3/4 cup chicken stock
1 tsp cornstarch
2 Tbsp water

1. Prepare the vegetables (and tofu if you’re using) by washing, cutting, and making any necessary holes or incisions. If you use long beans, you can create a wreath by tying a loose knot on one end and then winding the long leftover end around the loop until you run out of space; you can then stuff the wreath by filling the hole with fish paste.

2. Dust the vegetables with a bit of cornstarch where you plan to stuff them. This will help the fish paste adhere better and not come apart while cooking.

3. Prepare the fish paste by mixing it in a bowl with the ground pepper, chicken bouillon powder, vegetable oil, sesame oil, and egg yolk. Mix in one direction for best results. The paste will separate when the oils are added, but keep mixing to distribute the oil, and the paste will come back together. For a lighter mixture, beat the egg white in a separate bowl until frothy, then mix it in together with the fish paste mixture. (If you don’t have time, this step can be skipped, and the whole egg simply mixed into the fish paste at once.)

4. Stuff the vegetables with the fish paste mixture.

5. Heat a frying pan on medium-high heat. Add 1-2 Tbsp of vegetable oil. When the oil is hot, pan-fry the stuffed vegetables in the pan in batches. Avoid overcrowding. Let the stuffed vegetables brown for about 3 minutes on one side, then cover the pan and let them finish cooking. Depending on the vegetables, this may take another 3-5 more minutes. Lift the cover and turn the vegetables over to the other side to finish cooking and browning. Repeat with each batch until all the stuffed vegetables are cooked. Set the vegetables aside.

6. In the same frying pan, heat 1 Tbsp of vegetable oil. Add the chopped garlic. Once the garlic turns golden, add the fermented black bean paste, oyster sauce, sugar, and chicken stock. Mix and let the sauce come to a simmer. In a small bowl, mix the cornstarch with cold water until dissolved. Stir the cornstarch mixture into the sauce in the pan. You can serve the stuffed vegetables in the sauce or serve the sauce on the side.

vietnamese summer rolls (goi cuon) with peanut sauce: an OCD tutorial

Whether you call them Vietnamese summer rolls or fresh spring rolls or “salad rolls” (which is the direct translation of goi cuon), variations on these tasty bites are wildly popular these days. I see versions at all kinds of restaurants, in magazines, on blogs, and at potlucks and dinner parties, where they are often a hit among guests. I suspect the popularity is due in no small part to how good something so healthy can taste, as well as to its adaptability to whatever ingredients you have on hand.

I always took for granted how easy these are to make, but over the years I’ve been surprised (and sometimes a little appalled, I confess) at all the ways these can go wrong, from people soaking the rice paper in water until it turns into a soggy mess, to putting the finished rolls in the refrigerator until the rice paper turns tough. I am, admittedly, a little OCD in general, and even more so when it comes to particular foods. But someone might as well benefit from my obsessive tendencies, right? So here I give you my slightly OCD recipe for making classic Vietnamese summer rolls, which includes pork and shrimp. I hope you’ll find it worth your time! :)

This post is a submission to this month’s Delicious Vietnam, a monthly food blogging event started by A Food Lover’s Journey and Ravenous Couple, and hosted this month by Phuoc’n’delicious.

Vietnamese Summer Rolls (Goi Cuon)
Makes 12 rolls
Serves 4-6 as an appetizer

Summer rolls can be as easy or complicated as you want, but the better your individual ingredients, the better the roll. You want good rice paper that will retain some stretch. Bad-quality rice paper can not only tear while wrapping but sometimes even disintegrate in your fingers while you’re eating. I find that the Rose brand rice paper is usually reliable and more readily available (I’ve even found it in the ethnic aisles of everyday supermarkets). (See Viet World Kitchen for a fuller discussion on rice paper brands.) Some of the work can be cut down if you purchase pre-cooked, pre-shelled shrimp, but since those are often frozen, I find that their sometimes rubbery taste can ruin a roll. I also prefer to briefly cure my pork and then roast it in the oven (I use a toaster oven), which gives it a nice salty taste with some caramelized bits. Grilling the pork works as well, as does microwaving it if you’re in a hurry. My family usually uses pork belly or some kind of semi-fatty cut, but you can also use lean pork. Whatever the cut and cooking method, I’ve found that curing helps bring out the flavor of the meat.

The other key to a good roll is in how you wrap it. The rice paper should be properly moistened and topped with enough ingredients as to make a full, plump roll but not so much as to cause bursting or tearing. The thickness should be bite-size (not burrito-size!). The roll should also be wrapped tightly, so that the ingredients are not falling out as you eat it. And, finally, the rolls should have a consistent size, shape, and look if you are presenting them together on a dish.

When I serve these as an appetizer, I wrap the rolls a couple hours ahead of time, cover them with a damp cloth, and keep them at room temperature until they’re ready to be served. To complete the meal, I often serve these along with vermicelli noodle bowls, since many of the ingredients overlap. For a family-style meal, I prepare all the ingredients and let everyone wrap their own rolls at the table. In that case, I often make extra noodles so people have the option of assembling their own noodle bowls in addition to making rolls. Because the prep work can be rather involved, when I’m using this as a weekday meal, I’ll often make enough of everything for several meals and keep the leftover vegetables, meat, and noodles in the fridge overnight. The noodles will need to be reheated in the microwave to soften them up again, and the rice paper should only be moistened just before wrapping.

1/2 lb pork (as lean or fatty as you like)
2 Tbsp kosher salt
1/2 lb shrimp
6 oz. thin round rice noodles (also called vermicelli noodles)
4-6 lettuce leaves, whole (choose lettuce with soft leaves such as green, red, or butter lettuce)
2 cups Vietnamese herbs, such as mint, cilantro, fish mint, perilla, and Vietnamese coriander
1 cup bean sprouts
1/2 cucumber
12 sheets rice paper, plus a few extra in case any tear
a few sprigs of Chinese chives (optional)
peanut sauce (recipe follows)

1. Rinse the pork in cold water and pat dry with a paper towel. If working with one large chunk of meat, you might want to cut it into a couple pieces to help it cure more evenly and cook more quickly later (you’ll eventually be cutting the meat into small slices). To cure the pork, cover it liberally in salt (about 2 Tbsp or more — it will be rinsed off before cooking) and let it sit at room temperature for an hour or more while you prepare the other ingredients.

2. Clean and devein the shrimp. If you choose to take the shells off (to make deveining easier), reserve the shells to cook along with the shrimp in order to get a fuller stock. In a small sauce pan, boil about 1 1/2 to 2 cups of water (or just enough to later cover the shrimp). When the water comes to a boil, add the shrimp (and the reserved shells if they were taken off earlier). If there’s too much water, pour a bit out so that the shrimp is only just covered. Let the shrimp cook 2-3 minutes or until they just turn opaque. Take the shrimp out, peel, and slice in half lengthwise (slicing it this way will make them less bulky when wrapping). At this point, you can toss the shrimp shells back into the sauce pan and let the liquid continue to simmer to get a more concentrated stock. Reserve the shrimp stock for making the peanut sauce or for another use.

3. Boil a pot of water. Add the thin round rice noodles and cook 3-5 minutes or until al dente. Set an overturned bowl into a colander and drain the cooked noodles into the colander and over the inverted bowl, which will help the noodles not clump together. Rinse the noodles under cold water. This will stop the cooking, get rid of excess starch, and prevent sticking.

4. When the pork has cured for long enough, rinse off all the salt and pat dry. Roast in oven or toaster oven at 375°F for about 30 minutes. Let the meat cool, then cut into thin slices. Reserve any juices or pan drippings for making the dipping sauce later.

5. Wash and drain the lettuce, herbs, and bean sprouts. Wash the cucumber and cut into thin spears about 3 inches long.

6. Prepare your mise en place: Set the shrimp, pork, noodles, cucumber, lettuce, herbs, chives (if using), and bean sprouts into bowls or on a large platter. Fill a deep plate or wide bowl (a pie plate works well) with warm water. Set out the dry rice paper, a large plate for wrapping, and platter on which to set the wrapped rolls. Dampen a small kitchen towel or washcloth with warm water and wring it out well — you want it to be just a little damp but not dripping wet or it will ruin the rice paper. You’ll use this to cover the prepared rolls so that they don’t dry out before you serve them.

7. Moisten a sheet of rice paper by briefly dipping it into the plate or bowl of warm water, making sure that the entire surface is moistened. Shake off any excess water. Do not leave the rice paper in the water. The rice paper should still be stiff at this point, which allows you to lay it flat and smooth on your plate, where it will continue to soften. If you leave it in the water, it will become too soft to handle and will eventually turn wrinkled and soggy.


The rice paper on the left is too moist. Notice the haphazard wrinkling that results from the rice paper softening even before it was laid onto the plate. (If you wait too long, it will become difficult to even lay the paper flat onto the plate without it sticking to itself.) The rice paper on the right, however, has wrinkles that form an even gridding left over from the texture of the original dry rice paper and the way the paper gradually expanded on the plate after moistening. It still has some cling to it, as can be seen in the way it sticks to the plate. It is pliable but still has stretch.

8. Setting up the roll: You generally want to lay the ingredients out to be the length that you want your finished roll (about 5 inches is a good length). Keep an eye on the amount and proportion of ingredients as you arrange them, so that you end up with a full but not bursting roll. I also like to arrange the components of my roll in a certain order so as to provide a soft cushioning for the harder ingredients, otherwise things like bean sprouts may stick out and puncture the rice paper. Start by laying the moistened rice paper flat onto the large plate. Tear off a small piece of lettuce and set it on the lower third of the rice paper, centered (see photo below). (The leaves are soft and easy to use, but you can also use the stem too — I just crack the stem all over with my fingers so that it becomes soft enough to roll.) Using the lettuce as a base, add as few or as many herb leaves as you like. Arrange some vermicelli noodles into a stretched-out nest on top of the lettuce and herbs. Nestle a spear of cucumber, a couple bean sprouts, and a few slices of pork into the noodles. Arrange three pieces of shrimp (that have been sliced lengthwise) cut-side up on the top third of the rice paper, centered (see photo below) — this way, the outer part of the shrimp will show through when rolled.

9. Rolling: By the time you’ve arranged all the components of your roll onto the sheet of rice paper, the rice paper should be soft enough to handle but still be sticky and have some stretch to it. If there are any dry spots, just dab a bit of water with your fingers there and allow to soften. When ready, first fold the bottom of the rice paper up over the nest of ingredients. Then fold in the two sides. At this point, if using chives, tear off a piece about 1-2 inches longer than your roll and set it over the two folded-in sides and just above the other ingredients, leaving 1-2 inches of the chive sprig sticking out one side of the roll. (Some people fold the two sides in first and then fold over the bottom, stick in a sprig of chive, and continue to roll up — either way works.) Now comes the important part — as you roll, the ingredients will start to shift, so keep your fingers spread out across the length of the roll, pressing down and tucking things into place as you roll from the bottom up. If you’ve rolled sushi or, yes, burritos, it’s the same challenge of keeping the ingredients in a tight, neat bundle. Set the finished roll onto a serving platter and cover with the damp cloth.
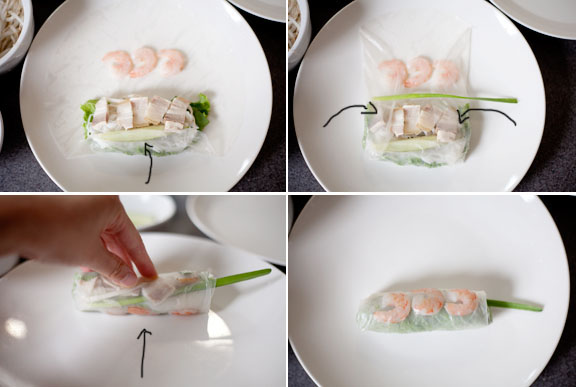
10. Repeat steps 7-9 until all rolls are complete. Rolls should be kept at room temperature and eaten within a few hours. It is best not put the rolls in the fridge, as the rice paper will thicken and harden.

Peanut Sauce
Makes about 1 cup

This is the more common peanut dipping sauce served in restaurants, not the traditional Vietnamese nuoc leo dipping sauce, which uses minced pork liver instead of peanut butter.

1 tbsp oil
2 cloves garlic, minced
1 tsp chili paste
1/4 cup hoisin sauce
1/2 tsp sugar
2 Tbsp peanut butter
1/4 cup shrimp stock and/or pork drippings from goi cuon recipe above, or water
toasted peanuts, crushed

Heat oil in a small sauce pan over medium-high heat. Add minced garlic, and when it begins to turn golden, add the chili paste, hoisin sauce, sugar, peanut butter, and shrimp and pork juices. Stir until the peanut butter has dissolved and mixture is well blended. Adjust the thickness of the sauce by adding more peanut butter to thicken or more stock to thin out.

In a small skillet, toast a handful of raw peanuts over medium heat until they turn golden. Crush peanuts with a mortar and pestle or chop with a knife. Sprinkle crushed toasted peanuts over the sauce before serving.

vietnamese herbs and herb farm in northern va

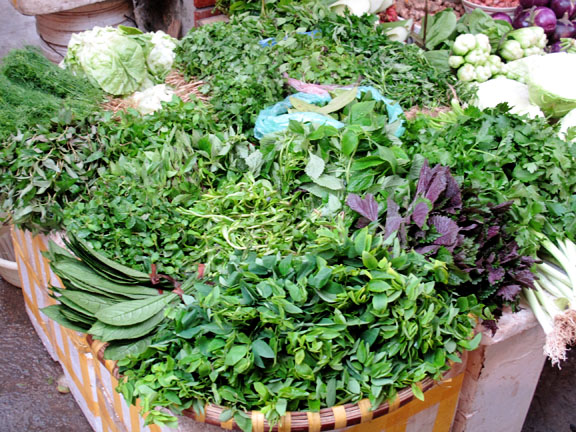
One of the most exciting things about visiting Vietnam for me is seeing the abundance of fresh herbs at wet markets and restaurants. I love sitting down (more often than not on a roadside plastic stool :) to a big plateful of herbs set in front of me. Many restaurants have whole baskets full of pre-picked, pre-washed herbs that the servers pile onto a plate, and after you finish your meal, they dump the remaining herbs back into the giant basket for the next guests. It may not exactly be up to the sanitation standards we’re used to in North America, but it definitely means you won’t be skimped on the herb plate! And during my last visit, I was excited to try such unusual greens as mango leaves for the first time.

Herbs and vegetables at a wet market in Hanoi.

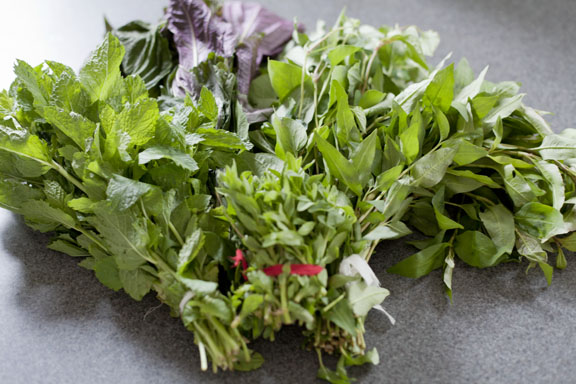
Unfortunately, fresh Viet herbs are not so easy to come by here in DC. In recent years I’ve seen more being sold at the Korean chain HMart, as well as at Grand Mart and Lotte. But these places are all a bit of a drive for me, and the selection can vary. So I was thrilled when I got an email from a reader last year telling me about a family in northern Virginia that grows and sells Vietnamese herbs right from their home. It’s still a bit of a drive, but I had to check it out for myself, and I found the selection and quality of these herbs to be fantastic and the owners just wonderful.

It’s quite a sight coming upon this little farm out in the middle of the suburbs. The home is located in Falls Church, VA (near the Eden Center), on Annandale Road, between Rose Lane and Slade Run Drive — you can’t miss the rows of trellises lining the largest yard along that road. The husband (an American Vietnam War vet) and his wife (from Saigon) have been selling herbs and vegetables here for over 20 years. Though not officially certified organic, they do not use any pesticides on their plants. The herbs cost about 50 cents per bundle, and they are carefully picked through and trimmed, so you always end up with neat, fresh bundles. In addition to the variety of herbs, they also sell various Asian leafy greens, including rarer kinds like water spinach and winter melon greens. On my last visit a few weeks ago, they also had squash blossoms. The herbs are only in season during the summer months, and I’ve been trying to get my fill of them before fall arrives.

So what do I do when I get my hands on a nice selection of fresh Vietnamese herbs? I love making lettuce wraps, fresh rolls, and vermicelli noodle bowls (I’ll post a few of these over the next couple days). Wraps are by far the easiest way to make good use of your herbs since you can wrap virtually any kind of meat or vegetable. Sometimes my family just buys crispy roast pork and brings it home to wrap in lettuce leaves with fresh herbs and banh hoi (noodle sheets), noodles, or even rice, and then dip into nuoc cham sauce. It’s such an easy meal, especially for spring and summer months when you can grill up some meat and wrap it with whatever fresh produce you have on hand from the season.

In light of how important herbs are in Vietnamese cuisine, I thought I’d start a Vietnamese herb guide on this site to begin compiling descriptions, uses, and links to recipes for various herbs as I come across them and use them in cooking. I’ll keep adding more in the future, but for now, you can head here to check out a few of my favorites.