7 articles Articles posted in chicken

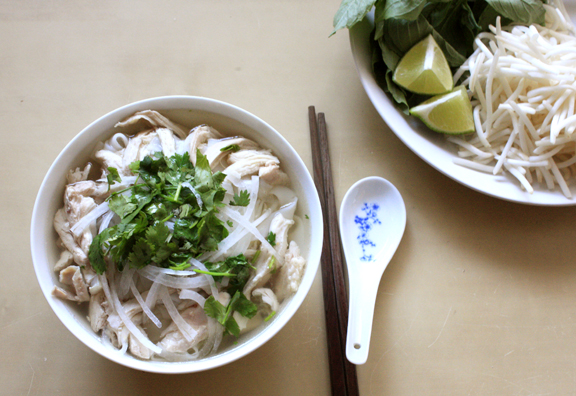
pho ga (vietnamese chicken noodle soup)

When you’re feeling under the weather, nothing soothes you more than a hot bowl of chicken noodle soup. When it’s cold and rainy outside, hot soup is especially satisfying!  I was actually a bit sick this past week, but because we don’t live close to any Vietnamese restaurants anymore and I didn’t feel like cooking, we just went to Souplantation (also called Sweet Tomatoes in some places). They have, hands down, the best “American” chicken noodle soup ever. The broth is clear and rich, and you just feel healthier eating it! It’s funny because every time we go, all the Asians get bowls of just soup, while all the Caucasians get bowlfuls of just chicken and noodles. Mom always taught me the nutrients are all in the soup!

The Vietnamese version of chicken noodle soup, pho ga, is something that my family made quite often because of its humble ingredients that were always readily available. Pho ga is often overshadowed by it’s richer, more flavorful counterpart, pho bo (or just referred to as “pho“), beef noodle soup. On cold or rainy days though, nothing hits the spot more than a piping bowl of pho ga. Its flavors are a bit more subtle than pho bo, but I think that it has its own complexities and subtleties that don’t hit you over the head quite as much as eating a bowl of pho bo.

Pho ga is pretty simple to make, especially if you have the poached chicken technique down pat. I simply use the stock that was left over from making poached chicken and throw the bones back in after removing all the meat, along with some spices. Sometimes I add in another pound of chicken bones if I happen to have any (or you can always purchase chicken necks from Asian grocery stores too).

Pho Ga
serves 4-6
adapted from various sources

Try to purchase fresh banh pho noodles found in the refrigerated section of Asian supermarkets. If those are not available, the dried ones will do as well. We sometimes also use fresh noodle sheets, which can be found in sheets or pre-cut into 1/2″ strips (the same sheets and strips used for banh uotand beef chow fun). If not cut, simply use a knife to cut to the desired width.

Soup:
1 whole chicken (about 4 lbs)
1-2 lbs chicken bones (not necessary, but adds richness to the broth)
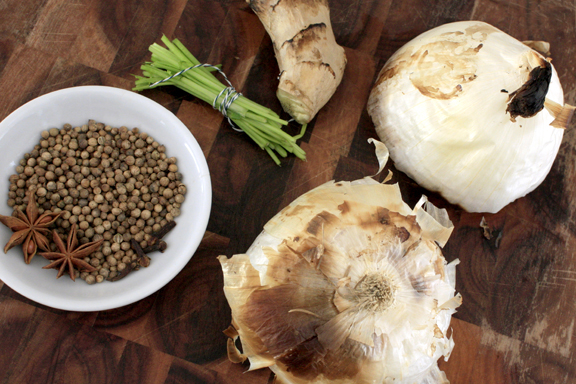
1 whole onion, unpeeled and cut in half
chunk of ginger, about 3″, unpeeled
2 Tbsp whole coriander seeds
4 whole cloves
2 whole star anise
1 1/2 Tbsp sugar (or rock sugar)
3 Tbsp fish sauce
small bunch of cilantro stems, tied
salt, to taste

1 pack banh pho (flat thin rick stick noodles)

Herb plate:
bean sprouts
cilantro
onions, thinly sliced
lime wedges
Vietnamese herbs such as Thai basil and culantro (sawtooth herb)

1. Toast the onion and ginger in the oven, with the temperature set to broil. Toast until the onion and ginger have a nice charred skin. This can take anywhere between 10-20 minutes. You can also toast them directly on your oven range, either with an electric or gas stove. Just be sure to watch them carefully, turn often, and have the exhaust fan on.

2. While the ginger and onion are toasting, you can also take the coriander seeds and lightly toast them in a pan until they are fragrant.

3. After the ginger and onion are cooled, rinse them under water and rub off all the skin. Use a peeler to peel off all the skin from the ginger. Cut the ginger into thick slices.

4. Before doing anything with the chicken or chicken bones, fill a pot with water to parboil the chicken.  This helps get rid of all the impurities and ensures a clear broth.  Heat water until it boils.  Place chicken and chicken bones (if you are using any) into the pot and boil for about 5 minutes. Discard the water and rinse the chicken and chicken parts. Then poach the chicken according to the directions here, but subtract 5 minutes from the timing. Also place in the extra chicken bones. Add the ginger, onion, cilantro stems, coriander seeds, star anise, and cloves to the water as well. This will help flavor the broth and chicken while it cooks. Make sure there is enough water to entirely cover the chicken.

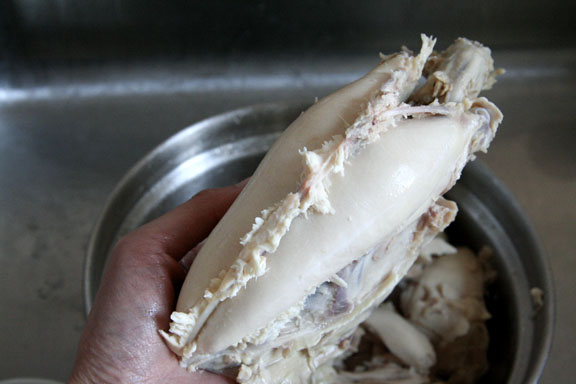
5. After you have removed the chicken and have cooled it in an ice bath, detach all the meat from the bones. Using a large butcher knife, break all the large bones to expose the marrow. Throw all the bones back into the pot.

6. Gently simmer for another 1-2 hours. Be sure not to let it boil too hard, or else the soup will become cloudy.

7. After 1-2 hours, strain the broth to remove all the bone shards. Add in the sugar and fish sauce. Add salt to taste.

8. Prepare noodles according to direction on package. If using fresh noodles, they shouldn’t need to be cooked for more than 1-2 minutes. You will want to err on the side of the noodles being more firm, because they will continue to cook as they sit in the broth. Our family also likes to use flat noodle sheets, as these are sometimes available fresh (and still warm!). They are oftentimes wider and have a smoother texture to them.

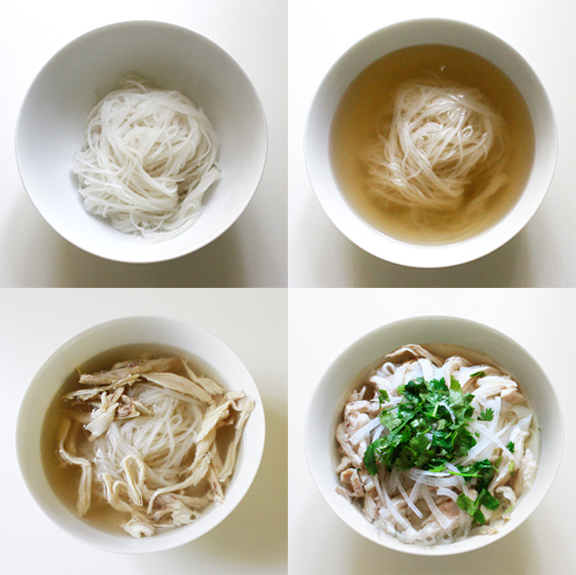
9. Prepare the bowls by placing noodles and shredded chicken pieces into a bowl. Ladle in the hot broth. Top with onions and cilantro.

10. Serve with herb plate and Sriracha and Hoisin sauce, if desired. I try to stay away from these sauces, as they tend to overpower the delicate flavor of the broth.

easy salt-baked chicken

Unlike my dad, who would make dinner from scratch every single day when we were growing up (we were lucky girls), I only cook a few times a week. When I’m ambitious, I’ll make most of my meals on the weekend and eat some variation of them throughout the work week. About every other week, I’ll make my mom’s yeem gok gai, salt-baked chicken, which feeds us for a good number of days. (It’s one of my favorite foods, and if I made it any more often than that, we’d be subsisting on chicken alone!)

Traditionally, salt-baked chicken is a Hakka dish made by encasing a whole chicken in salt and baking this in the oven. My mom’s simplified version involves dry-toasting salt in a pan before adding it to already-cooked chicken. The toasted salt, combined with fried shallots, gives you lots of smoky flavor with very little work.

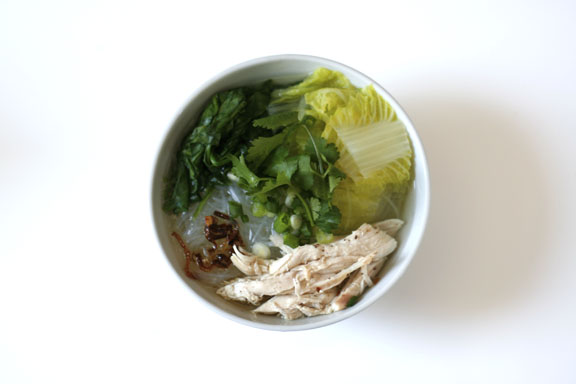
I like to make this from poached chicken, and we’ll usually eat a few meals of this with rice and veggies and a few with noodle soup made from the broth. In fact, one of my favorite lunches is made almost completely with the leftovers: bean thread noodles cooked in the leftover broth, topped with leftover chicken, greens, and fried shallots and oil.

Easy Salt-Baked Chicken
Serves 4-6

I’ve noticed that regular table salt works best in this recipe, as it gets a nice color and more smoky taste, whereas natural salt (which I’ve used here) doesn’t turn color as much, and kosher salt even less so. I like to make a lot of the salt and pepper mixture and keep it in a spice jar, thereby cutting down on one of the steps the next time I make this dish. Same with the fried shallots and oil, which keeps well in the refrigerator.

1 poached chicken
1 Tbsp salt
1 tsp pepper
1 medium shallot, sliced
1 Tbsps vegetable or canola oil
1 Tbsp sesame oil, or more to taste

1. Shred one poached chicken into large pieces and keep in a large bowl. (Like a true Asian, I like to keep a bit of meat on the bones to gnaw on, but if you like, you can reserve the bones for stock.)

2. Put the salt in a small pan on medium heat and let it slowly toast until it turns a very light golden color. Keep close watch and give the pan a couple shakes so that the salt doesn’t burn. If it turns color too quickly, turn the heat down to medium-low.

3. Once the salt is done, add the pepper, give the pan a few shakes, and turn off the heat. Make sure you stand back and ventilate well as the pepper is very strong when heated.

4. In another small pan, heat the oil on medium-high, then add the sliced shallot. When the shallot begins to turn golden, turn off the stove and take the pan off the heat. Let the shallots continue to brown in the pan, but watch to see that they don’t burn.

5. Add the sesame oil, fried shallots and shallot oil, and half of the salt and pepper mixture. Toss all together and adjust seasoning to taste.

poached chicken


For our first post, I thought I’d write about something we loved to eat growing up and that I now make all the time: poached chicken.

My parents learned the key to making poached chicken from some of their Chinese restaurant friends who frequently made white-cut chicken (you know, the kind you see hanging in meat shops in Chinatown, served with a ginger-scallion sauce). The most important step, they realized, is to plunge the poached chicken into an ice-water bath immediately after cooking. This stops the cooking and makes the meat firm and the skin crisp. Otherwise, everything can end up a bit mushy.

To this my mom added her method of slowly poaching the chicken in hot water with the heat off. I don’t know if I’m supposed to say this, but my family actually likes our chicken with just the faintest hint of pink, and turning the heat off allows the chicken to cook very gently, coming barely to the point of doneness before being shocked in ice water. And when I eat any kind of leftover poached chicken, I tend to just eat it cold, because reheating it takes away all the lovely moistness that makes poached chicken for me. My favorite part of all is the tenderloin, the inner breast meat, probably the juiciest part of the whole bird.

So here’s my mom’s method for poaching chicken. If you prefer, you can add some aromatics or seasonings to the water, like ginger, garlic, and scallions (for an Asian flavor), or onions, garlic, carrots, and celery (for a more American / Western flavor). But I actually don’t like to put anything into the water in order to keep the flavor neutral. That way I can use the chicken and the broth to make any variety of dishes the rest of the week, which is how long this recipe feeds my husband and me.

Poached Chicken
Serves 4-6 people

1 whole chicken, about 4 lbs
salt, if desired

1. Clean and trim off the excess fat of one chicken.

2. Fill a large pot with just enough water to cover the chicken. Add some salt if desired. Bring the water to a boil, then place the chicken into the pot breast side up, making sure the entire chicken is fully submerged in the water. (You can scoop some water out at this point if there is too much, in order to get a more concentrated stock.)

3. Leave the pot on high heat to let the water come back up to a boil. When this happens, carefully turn the chicken over so that the breast side is down. Cover the pot. Turn off the heat, and let the chicken steep for about 45 minutes to 1 hour. Be careful not to overcook it.

4. About 5 minutes before the chicken is done, prepare an ice bath by filling a large bowl with cold water and a trayful of ice cubes.

5. When the chicken is ready, carefully lift it out of the pot with tongs or a slotted spoon. If you’re going to serve the chicken Chinese style (chopped into large pieces, bones still in), be careful not to break the skin. Plunge the entire chicken into the ice bath and let it cool, turning over once to make sure both sides get submerged.

From this point, you can do anything with the chicken: Make white-cut chicken with ginger-scallion sauce or Hainan chicken and rice. Use the meat for enchiladas, quesadillas, salads, sandwiches, and noodle soups. Save the broth for making soups and sauces (I like to freeze some of it for another time). I’ve heard that you can even dry the whole chicken off and stick it under high heat in the oven for some super-moist roast chicken, which I’d like to try some day.

But what I find myself doing, time after time, even with all the other possibilities out there, is make my mom’s easy salt-baked chicken. Stay tuned!